
Multiplication wheel - Interesting project for teaching multiplication to kids.
In this post, I will share an interesting project we can do with our kids to teach them basics of multiplication and introduce them to programming. I did this with my 5-year-old daughter and it was a huge hit.
Multiplication wheel puzzle
I call it multiplication wheel puzzle. It basically has two wheels that you can turn around to know the answer to multiplication puzzle. The one we will be making can do multiplication of 2 through 5 tables for numbers 1 to 12.
Things you need
Things you need to do this project
- Heavyweight paper or chart paper like this.
- Push pins
- Small wooden disk or bottle cork or something similar to safely hold push pin.
Building
Making bottom wheel.
Make bottom wheel by drawing a circle and dividing it into twelve equal parts (30 °). Then, write multiples (a.k.a skip counting) of numbers 1,5,4,3,2 for 1 through 12 like below.
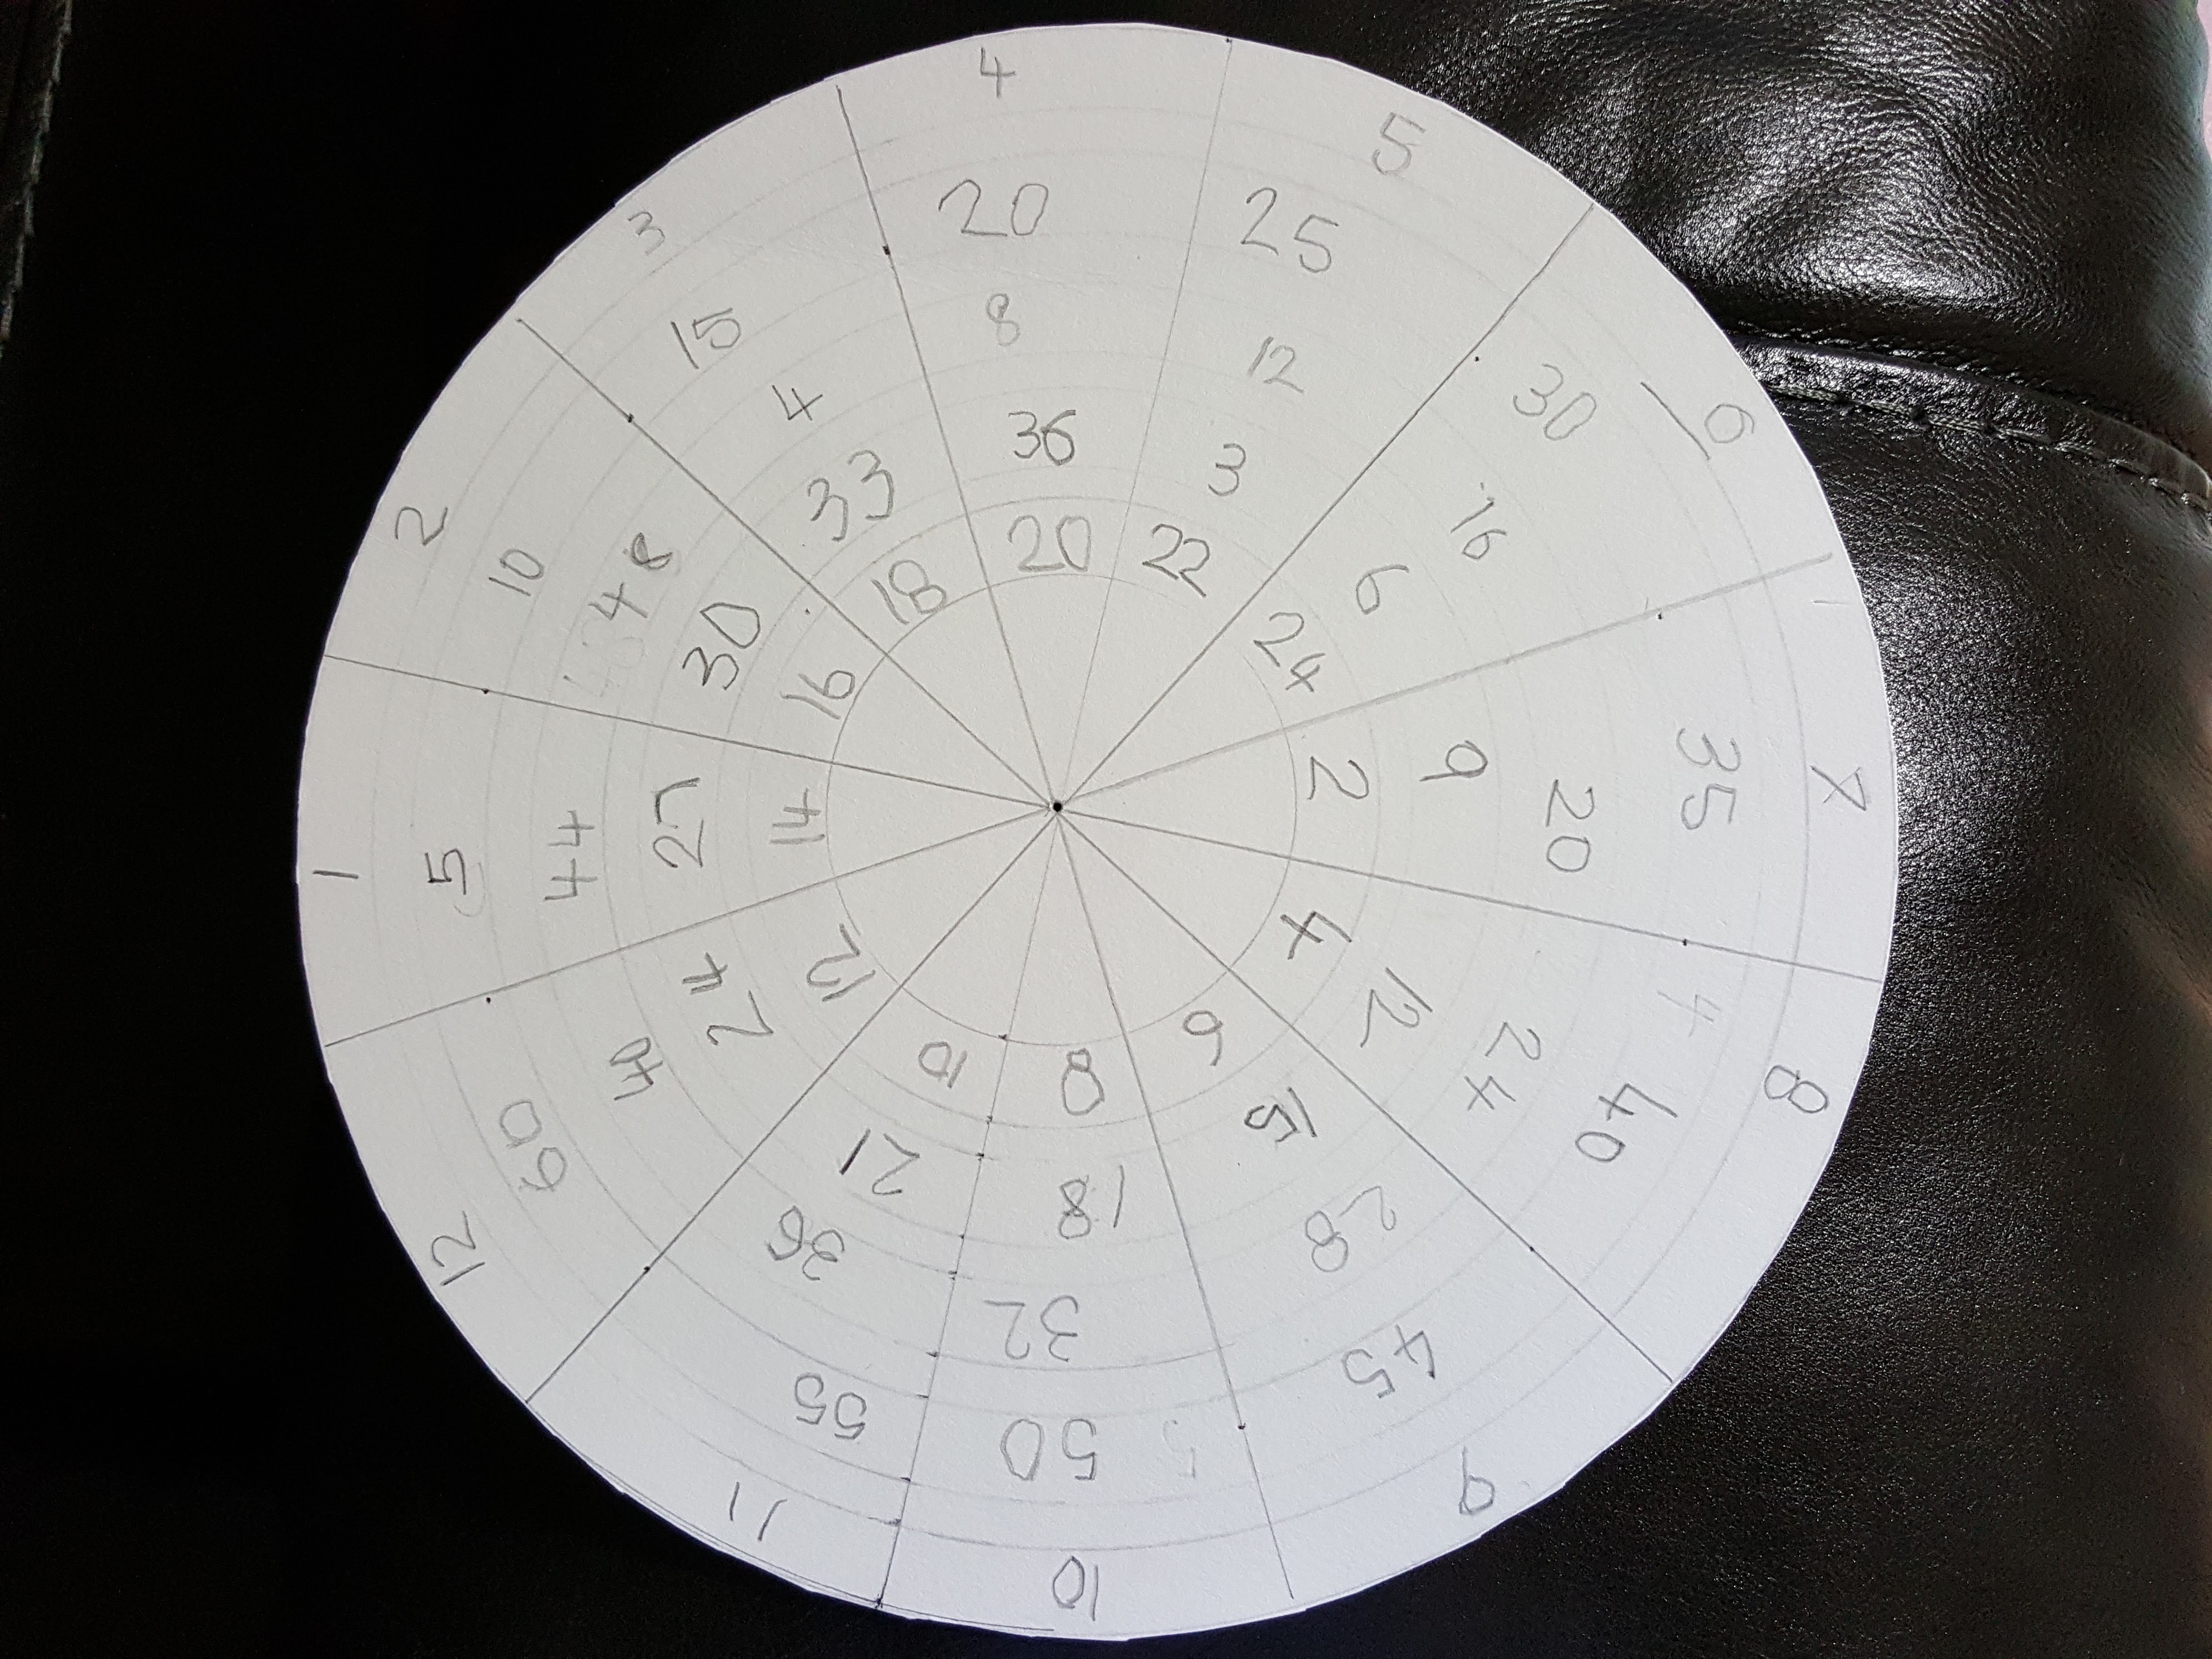
The first number of each series begin at every other consecutive part. i.e. Multiples of 5 start at 1, multiples of 4 starts at 3, multiples of 3 start at 5 and so on. The measurements we used are 10 cm radius for outer circle and inner circles are drawn with radius 9, 8.5, 7.5, 7, 6, 5.5, 4.5, 4, 3 cms respectively. Let your kid help you as much as possible.
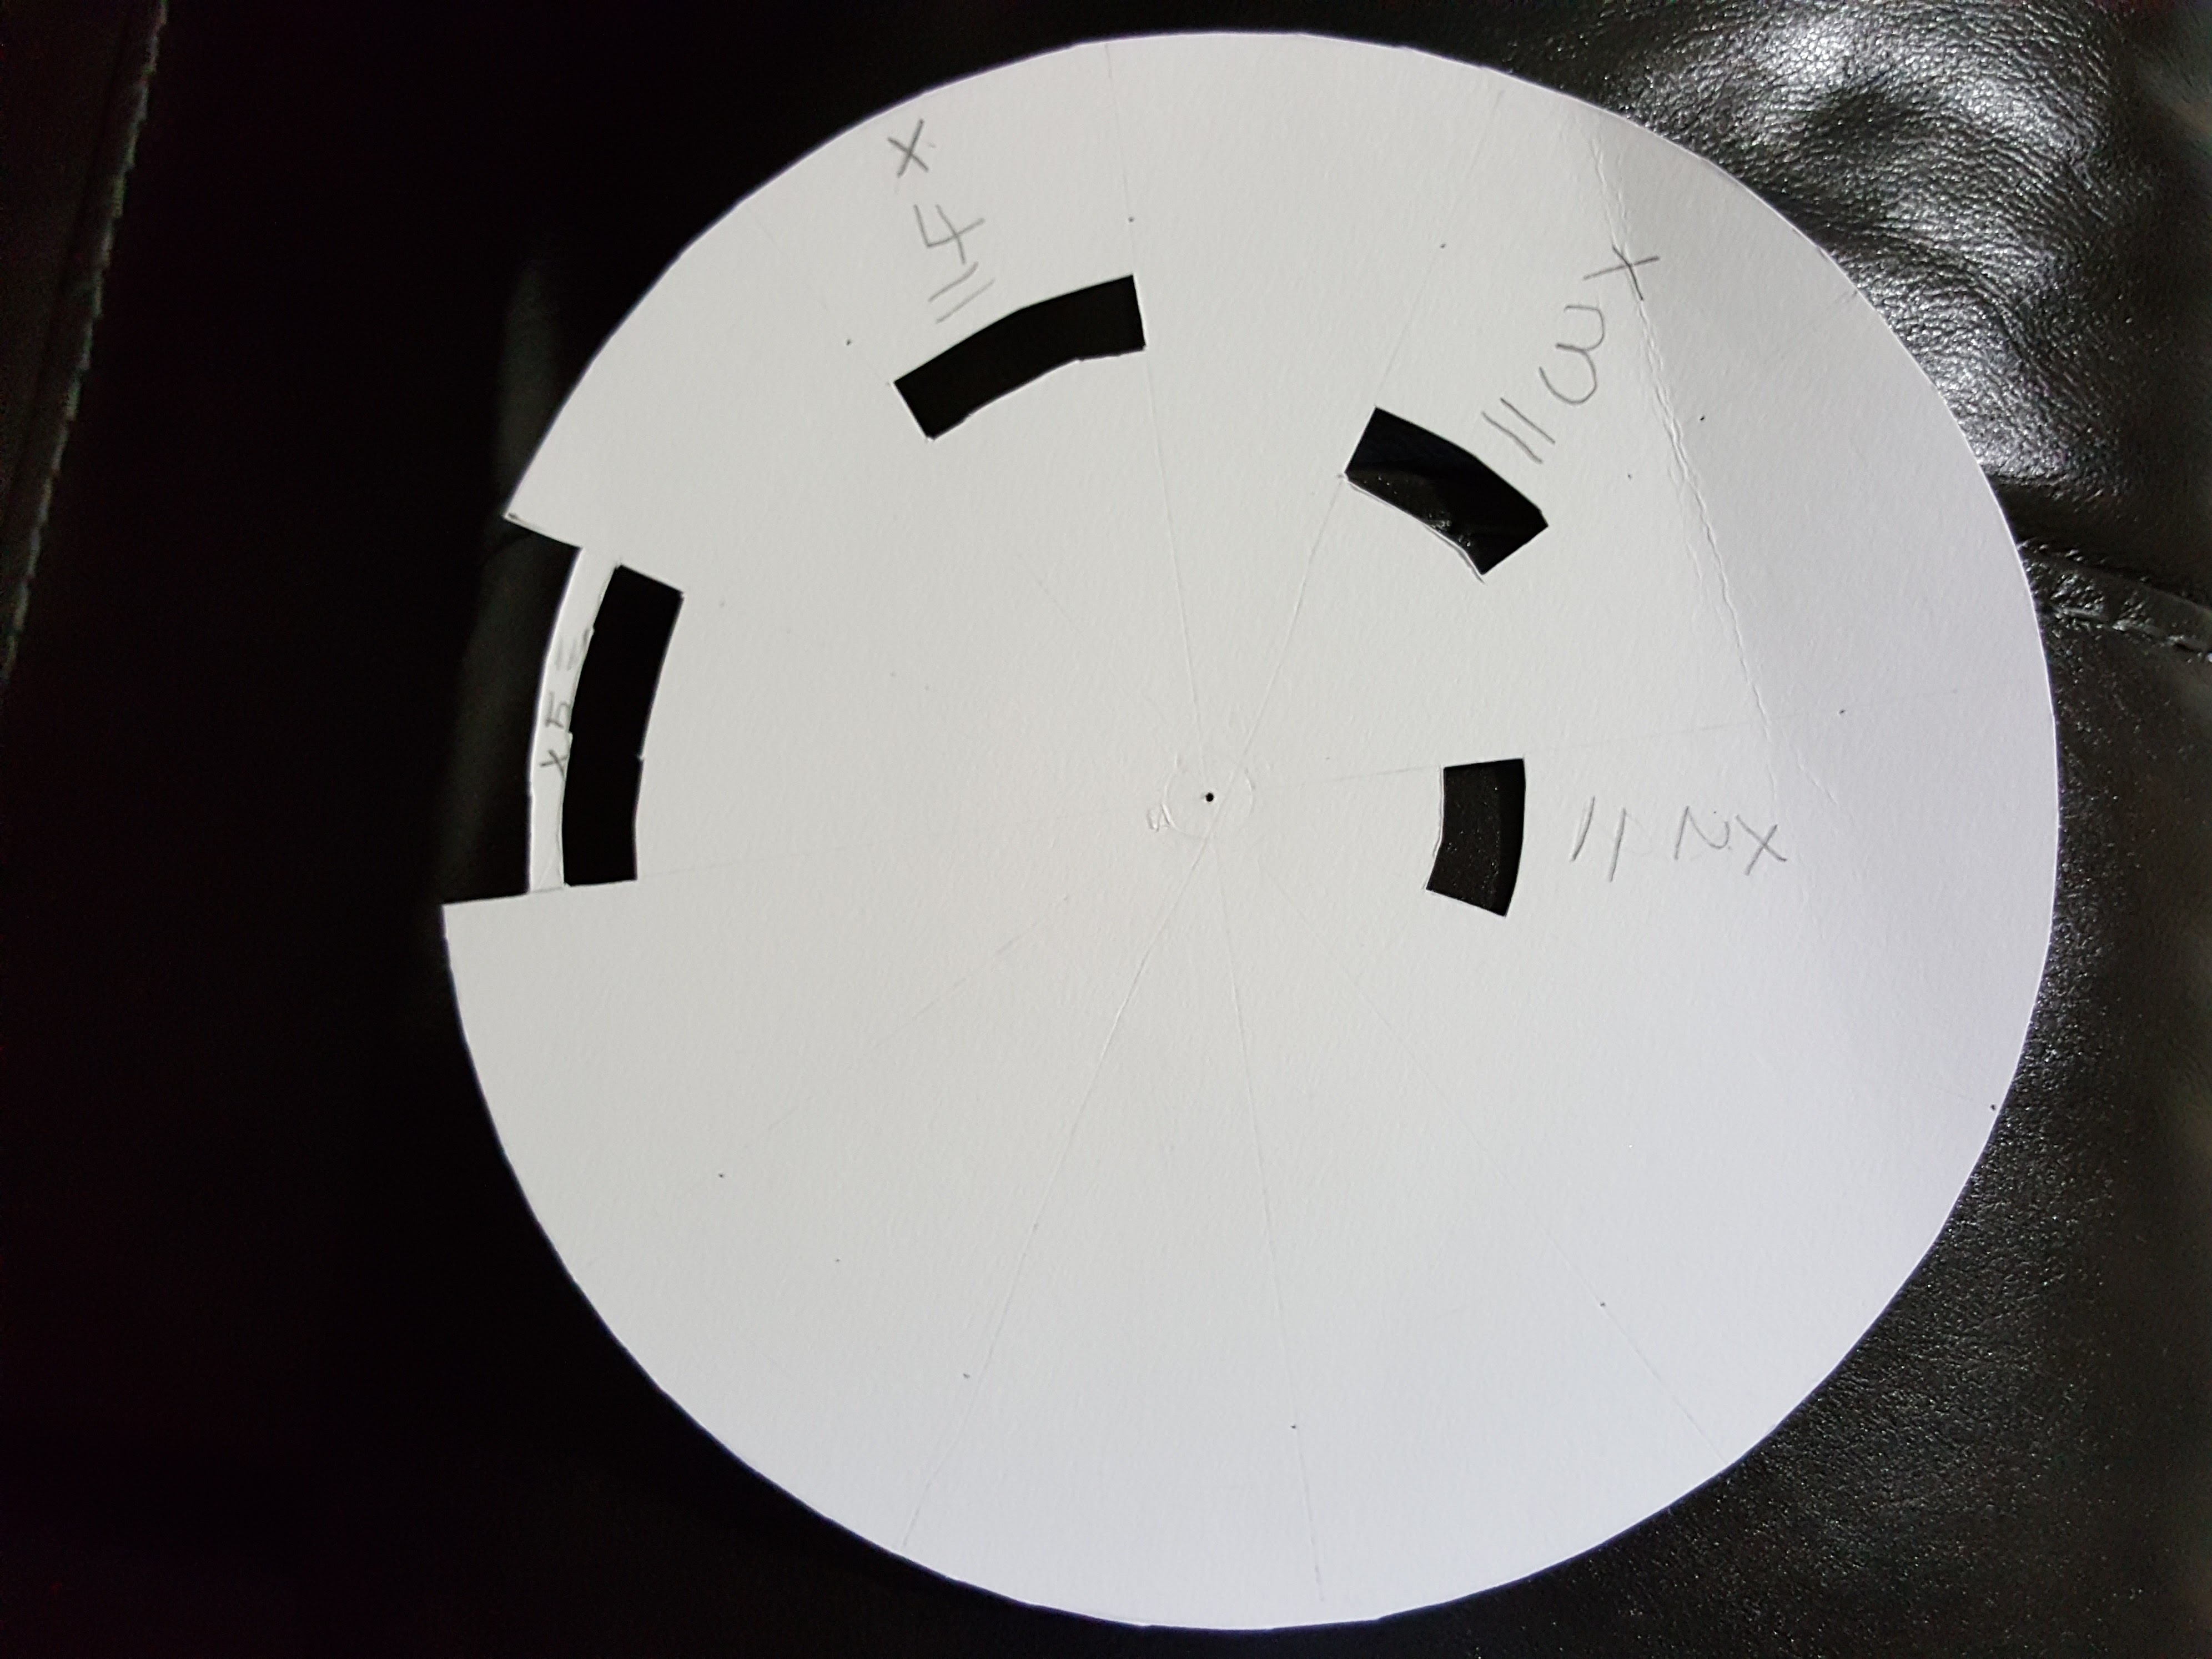
Making top wheel.
Make top wheel by drawing dividers and inner circles with same measurements as bottom wheel and cut out holes. Write 5 X = , 4 X =, 3 X = , 2 X = adjacent to each hole like below.
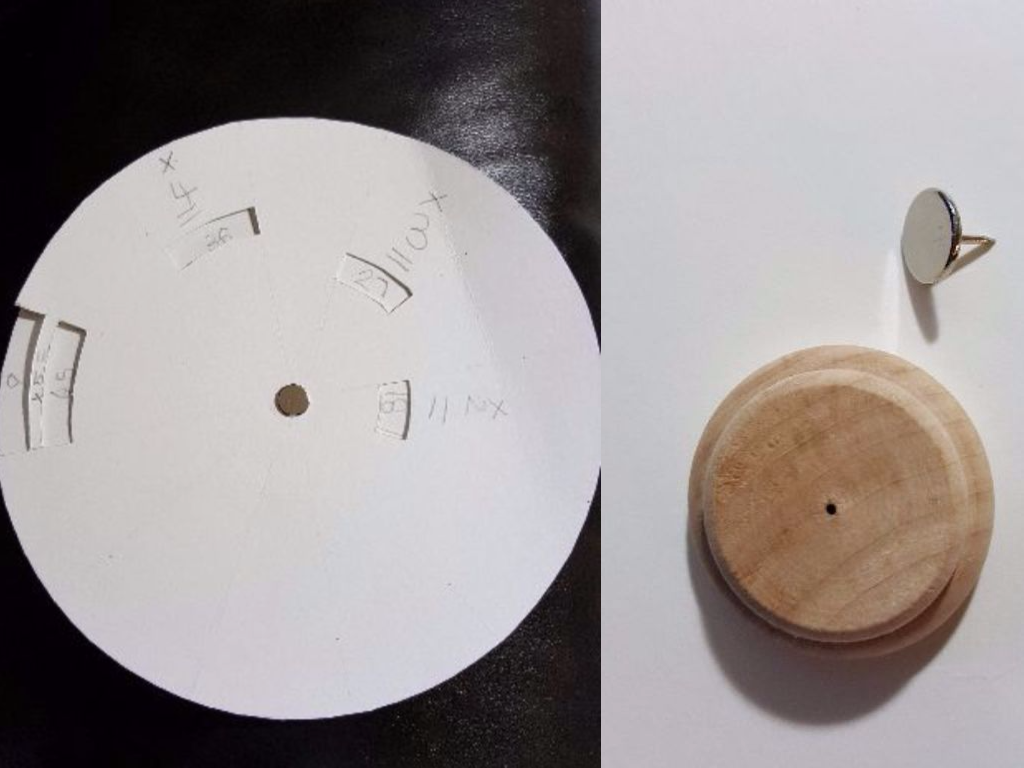
Putting it together
Put together both wheels by inserting push pin on the top and placing small wooden disk at bottom such at they attach firmly like below.
Playing with it
Play with your kid by asking a multiplication quiz (eg. 9 X 5 =) and they can tell the answer using the multplication wheel. To know the answer to multiplication problem, turn the top wheel so that outermost hole aligns with multiplicand ( eg. 9) and the hole next to multiplier ( eg. 5) shows the answer. The animation shows how to use it
Teaching basics of multiplication to kids
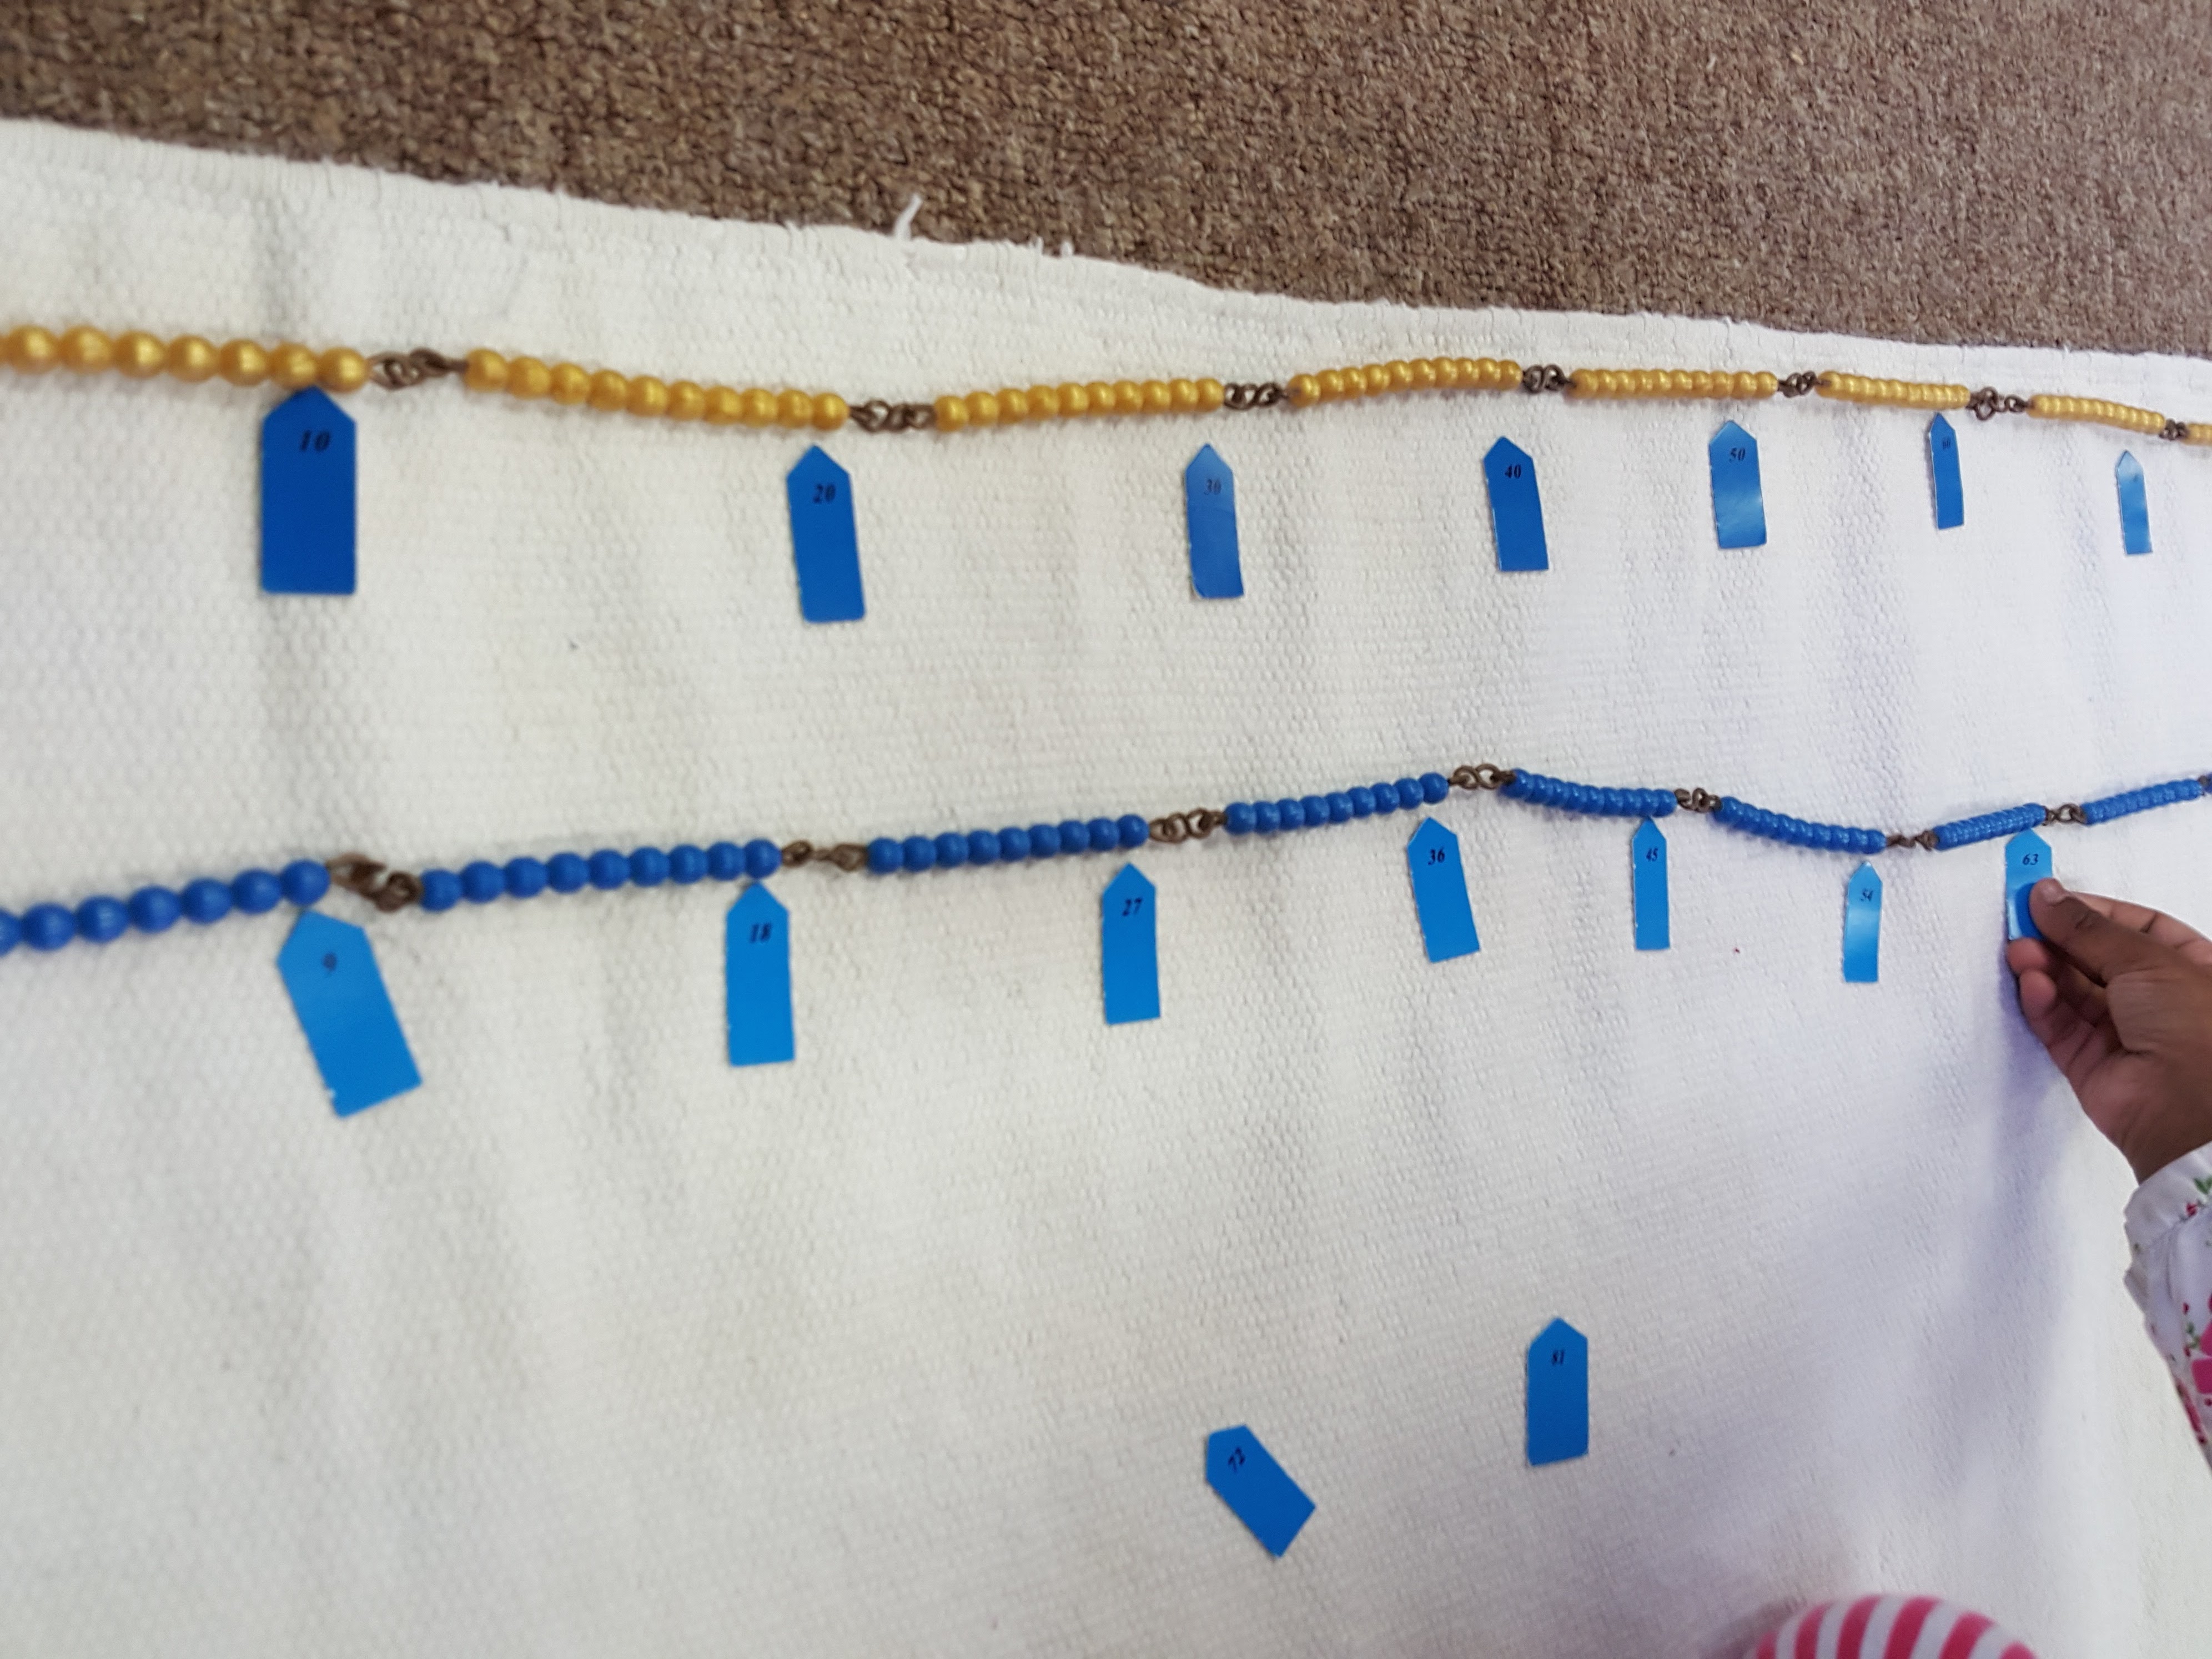
After kids learn counting and basic addition. We should teach them skip counting (i.e 2,4,6... , 3,6,9... etc). In a Montessori school, they will learn it with materials like beads chain and number markers. They will have a beads chain for each number linked at an appropriate number of skip counting. The kid has to count the beads and place number markers at the end of each joining like this.
Alternatively, you can play the game with your kid to say next number in skip counting by taking turns.
Multiplication becomes easier, once they can do skip counting. Multiplication of M X N is basically repeating skip counting of M , N times or vice versa.
The multiplication wheel we made, basically shortcuts the repetition. Rotating the wheel through each number repeats skip counting. So by explaining how this project works, we can teach them basics of multiplication. With enough repetition, they will remember answers top their head and able to tell without spinning the wheels.
Extending it further
My daughter liked it so much that she wanted to do multiplication all the way up to 10 using this. Although, we could hand create another one for up to 10. I wanted to do it using a computer and introduce computer programming to her. I started writing javascript code below to create multiplication wheel for 12 X 12
She watched while I was coding and she wanted to help. I told her that she need to learn the computer language to do this. But as I played with the code, I let her press Run button and see the magic happen.
As there wasn’t enough space to fit all 12 multiples, I split them into front and back of the bottom wheel. You can download this pdf to print front and back for both bottom and top wheels. For the bottom wheel, attach front and back to each other with chart paper in between. For the top wheel, cut the holes around the places marked X. Put them together using a push pin and wooden disk as before. Play and have Fun!.